
A B2B buying guide to tray sealers for ready meal processors, contract packers, central kitchens, and meal kit assemblers. Covers seal frame sizing, MAP gas flush, throughput, gas supply, and FAT checks.
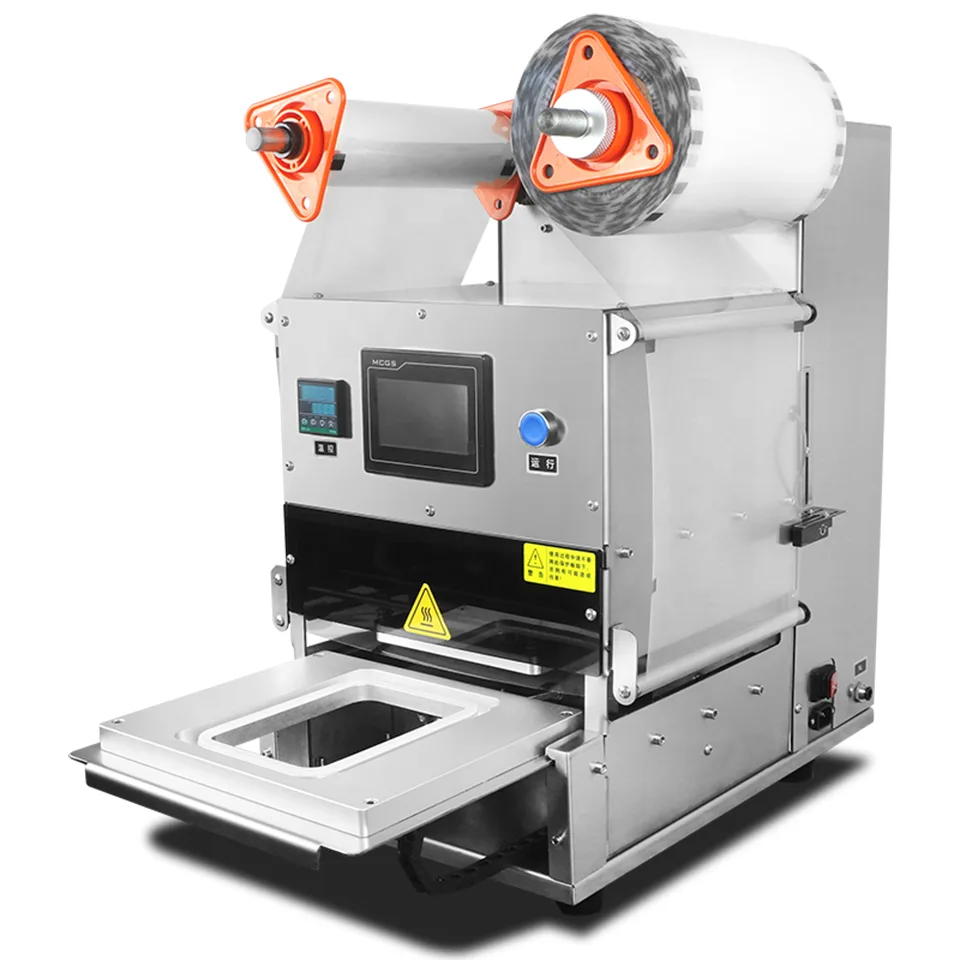
A tray sealer heat-seals a top film onto a pre-formed plastic, aluminum, or pulp tray, and on gas-flush models it also does MAP (Modified Atmosphere Packaging) headspace replacement before the seal closes. For ready meal processors, contract packers, central kitchens, and meal kit assemblers running 200 to 5000 packs per shift, choosing the right tray sealer is one of the most consequential equipment decisions on the line, because the sealer sets the ceiling for pack format, shelf life, throughput, and operating cost. This guide is written for procurement managers, production engineers, and export buyers evaluating a 2026-ready tray sealing line.
Key Takeaways
- A tray sealer is sized by seal frame size (mm), throughput (packs/hour), seal head drive type, and whether it includes gas flush for MAP.
- For ready meals and meal kits, gas flush at residual O₂ below 1% extends chilled shelf life from 3 to 5 days to 7 to 10 days versus vacuum-sealed film.
- Common seal frames are 260 mm, 300 mm, 370 mm, and 430 mm; pick the largest current tray plus 20 to 30 mm clearance, not the largest tray you might run in five years.
- Throughput under real production is typically 60 to 70% of the supplier brochure figure because evacuation, gas flush, and seal dwell dominate cycle time.
- Final cycle time, gas mix, and seal parameters must be confirmed against the actual product, tray volume, and cold-chain temperature — supplier documentation is the binding reference.
What a Tray Sealer Does in a Ready Meal Line
A tray sealer takes a pre-formed tray (CPET, APET, PP, aluminum foil, or pulp fiber), loads it with product, optionally evacuates and flushes the headspace with a controlled gas mix, then heat-seals a top film onto the tray rim and trims off the excess. In a ready meal or meal kit line, the sealer sits between the dosing station and the metal detector or checkweigher. It is the only machine in the line that both forms the pack geometry and sets the atmosphere inside the pack, so its performance directly drives shelf life, leak rate, and consumer perception of freshness.
Core Specifications Buyers Should Compare
| Specification | Why It Matters | What Buyers Should Check |
|---|---|---|
| Seal frame size (mm) | Defines the maximum tray footprint in one cycle. | Pick the largest tray in your current SKU mix plus 20 to 30 mm clearance. |
| Throughput (packs/hour) | Sets the ceiling on shift output and line balance. | Ask for the figure at your residual O₂ target on your tray size, not the fastest cycle on water. |
| Seal head drive type | Manual, pneumatic, or electric — drives load consistency. | Pneumatic for 240 to 1200 packs/hour; electric servo for higher speeds or validated seal pressure recording. |
| Gas flush / MAP option | Replaces headspace air with N₂ / CO₂ mix to extend shelf life. | Confirm residual O₂ capability, gas mixer integration, and gas consumption per cycle. |
| Vacuum pump capacity (m³/h) | Determines achievable residual O₂ and evacuation time. | For ready meal MAP at sub-1% O₂, expect 20 to 100 m³/h oil-sealed rotary vane pump or equivalent dry pump. |
| Seal temperature and dwell | Under-seal leaks gas; over-seal burns through the film. | Confirm PID temperature control and settable dwell from 0.5 to 5.0 seconds on the HMI. |
| Material grade | SUS304 standard; SUS316 for high-salt or acidic meals. | Ask for a mill certificate, not a sales claim. |
| Recipe storage (HMI) | Multi-SKU lines need to switch gas mix and seal parameters without manual reset. | Verify recipe count (at least 20) and changeover time (under 30 seconds). |
How to Choose the Right Tray Sealer for Your Application
Match the Seal Frame Size to Your Real SKU Mix
The most common procurement error is oversizing the seal frame. A 430 mm frame sounds flexible, but it forces a 9 to 12 L chamber volume on every cycle even when you are running 250 g ready meal bowls at 1.2 L headspace. The pump has to evacuate 8 to 10 L of wasted air per cycle, which doubles evacuation time and caps real throughput at 30 to 40% of the brochure number. The right frame size is the largest tray in your current SKU list plus 20 to 30 mm clearance.
Decide If You Need MAP or Seal-Only
A seal-only machine is appropriate for ambient-stable ready meals, dried pasta, frozen meals going straight to blast freezing, and any product where shelf life is not the limiting factor. A gas-flush machine is required for chilled ready meals with fresh protein, fresh-cut vegetable toppings, or soft cheese, where MAP can extend chilled shelf life from 3 to 5 days under vacuum-only film to 7 to 10 days at sub-1% O₂. The MAP option adds 25 to 40% to the equipment price and requires a gas supply architecture (nitrogen generator or cylinders plus a carbon dioxide bundle), so it should be justified by the QA team before the order is placed.
Calculate Throughput Against Your Line, Not the Brochure
A semi-automatic tray sealer with one operator typically delivers 240 to 480 packs/hour at sub-1% residual O₂ on a 260 mm frame. A pneumatic semi-auto can run 360 to 1200 packs/hour on a smaller frame. A fully automatic rotary tray sealer with denester, conveyor infeed, and outfeed runs 15 to 30 trays per minute, equivalent to 900 to 1800 packs/hour, but needs the upstream dosing station and downstream metal detector to match. Build the line balance around the slowest station: if seal dwell is 2.5 seconds, that is 24 cycles/minute maximum, regardless of how fast the conveyor runs.
Confirm the Gas Supply Architecture
A MAP tray sealer needs nitrogen (food-grade, 99.9% purity), carbon dioxide (food-grade, 99.8% purity), and in some lines a calibrated premix. Supply pressure is typically 6 to 8 bar. Confirm whether the gas mixer is integrated into the machine frame or supplied as a separate skid — a separate skid is easier to service and calibrate on a HACCP schedule. Nitrogen consumption on a typical 250 g ready meal tray at 99% replacement is 1.5 to 2.5 L per pack, so a 5000-pack shift requires roughly 8 to 12.5 m³ of N₂ supply plus 6 to 9 m³ of CO₂.
Buyer Checklist
- Confirm product type, tray size, and target residual O₂ before quoting.
- Decide seal-only vs gas-flush MAP based on shelf life targets, not brochure features.
- Size the seal frame to your largest current SKU plus 20 to 30 mm clearance.
- Ask for measured throughput at your residual O₂ target on your tray size.
- Confirm vacuum pump brand, model, oil type, and service intervals.
- Check seal temperature control: PID with thermocouple feedback, not a thermostat.
- Ask for an HMI recipe system storing at least 20 product recipes with changeover under 30 seconds.
- Verify food-contact material grade (SUS304 or SUS316) with a mill certificate.
- Confirm gas supply pressure, consumption per cycle, and whether the gas mixer is integrated.
- Request an FAT protocol that includes residual O₂ readings at three setpoints and a seal pull test.
- Confirm spare parts package: seal gaskets, heater bars, film cutting blades, vacuum pump oil.
- Ask for after-sales response time and on-site commissioning in the destination country.
Common Mistakes to Avoid
The most common error is buying a 430 mm frame when 90% of current SKUs fit a 260 mm frame, which doubles evacuation time and halves throughput. The second is specifying cycle time based on the fastest machine cycle rather than the cycle needed to reach the agreed residual O₂ — a 2-second cycle is meaningless if it only delivers 95% gas replacement. The third is trusting the brochure residual O₂ figure without testing on the real product; pump performance drops 10 to 15% between an empty chamber and a loaded chamber with moist protein and sauce. A fourth error is failing to budget for the gas supply architecture: nitrogen generator, cylinder bundle, CO₂ bulk tank, and gas mixer skid add 8 to 18% to the total installed cost and are often missed until installation week.
FAQ
What is a tray sealer used for?
A tray sealer heat-seals a top film onto a pre-formed plastic, aluminum, or pulp tray containing ready meals, fresh meat, fish, salad, fruit, bakery, or meal kit components. Gas-flush tray sealers also replace the headspace air with a controlled mix of nitrogen and carbon dioxide to extend chilled shelf life on fresh and prepared foods.
What is the difference between a tray sealer and a vacuum packaging machine?
A vacuum packaging machine evacuates nearly all air from a flexible pouch and seals under negative pressure, typically at lower cost per pack but with a less rigid retail presentation. A tray sealer keeps the product in a rigid retail-ready tray and either seals under atmosphere or flushes a controlled gas mix into the headspace before sealing, preserving product shape, color, and moisture on fresh ready meals.
What throughput can I expect from a semi-automatic tray sealer?
A semi-automatic tray sealer with one operator typically delivers 240 to 480 packs/hour at sub-1% residual O₂ on a 260 mm seal frame. Pneumatic semi-automatic machines can reach 360 to 1200 packs/hour on smaller frames. Throughput under real production is usually 60 to 70% of the supplier's brochure figure because evacuation, gas flush, and seal dwell dominate cycle time.
Do I need a gas-flush MAP option for ready meals?
Gas-flush MAP is required for chilled ready meals containing fresh protein, fresh-cut vegetables, or soft cheese where shelf life is the limiting factor. MAP at sub-1% residual O₂ with a 60 to 80% CO₂ / 20 to 40% N₂ mix typically extends chilled shelf life from 3 to 5 days to 7 to 10 days. For frozen meals, ambient pasta, dried products, or items going directly to retort sterilization, seal-only is sufficient.
What maintenance does a tray sealer need?
Daily: wipe seal bars, check film alignment, verify gas supply pressure. Weekly: clean vacuum pump inlet filter, check seal temperature uniformity. Monthly: change vacuum pump oil, calibrate O₂ sensor if fitted. Quarterly: replace chamber gasket if compressed. Annual: full pump service and seal bar replacement if seal quality drifts. Budget 4 to 6 hours per week on a single-shift operation.
Final specifications — including seal frame size, throughput, gas mix ratio, residual O₂ target, and seal parameters — should always be confirmed against the selected model and the supplier's application documentation. The numbers in this guide are industry reference points, not guaranteed performance figures for any specific machine.